Cypress Tests, Media Profiles background color - This week in Orchard (13/12/2020)
Have you ever wondered how to write end-to-end tests for your Orchard Core application? Check out our current post to read about Cypress, which is a next generation front end testing tool built for the modern web. But first, let's start with the other exciting improvements!
Orchard Core updates
Specify background color
Media Profiles feature in Orchard Core is a powerful feature allowing you to specify image resizing options and much other stuff. A profile can then be called with the profile name resize_url: profile: 'banner' rather than having to specify all the resizing options that may apply. We showed you a great demo in this This week in Orchard post about the Media Profiles feature. And here we mentioned the media crop picker and the alt text editor features with YouTube videos too. If you haven't heard about these features, you should check out those posts and videos, especially if you are dealing with several images on your website.
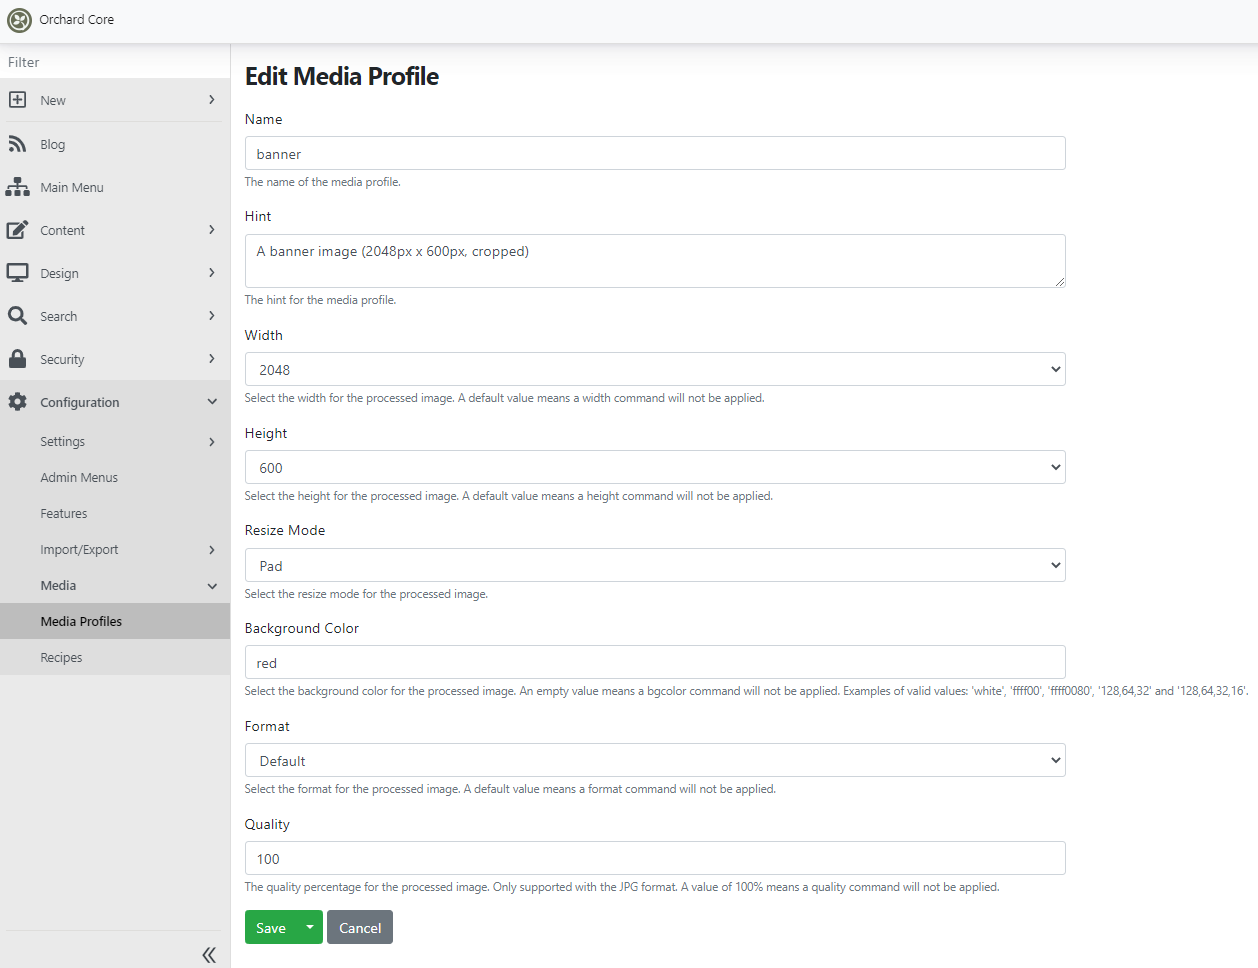
The new feature is that now you can specify the background color for the processed image. Let's try this out! Set up your site using the Blog recipe, then navigate to the admin UI of Orchard Core. Head to Configuration -> Media -> Media Profiles and edit the predefined banner Media Profile. Set the resize mode to Pad or BoxPad. If you do that, you will see a new option here called Background Color. Using that property you can select the background color for the processed image. The hint shows you the example values, let's just put red there.
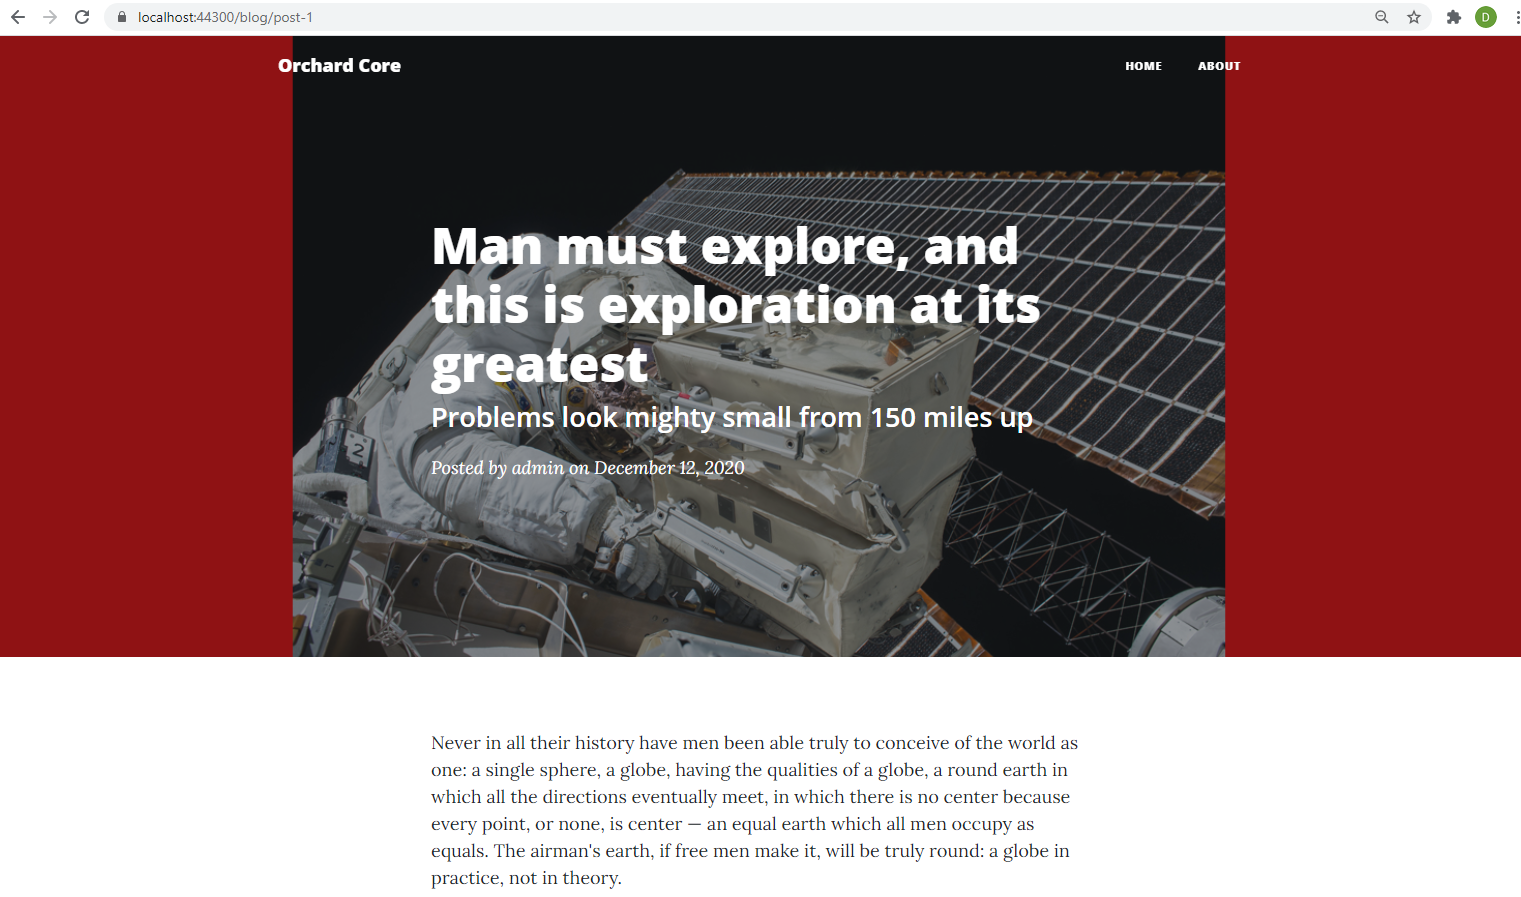
Save this setting and open the predefined blog post. And in the screen below you will see our beautiful header with the red background color.
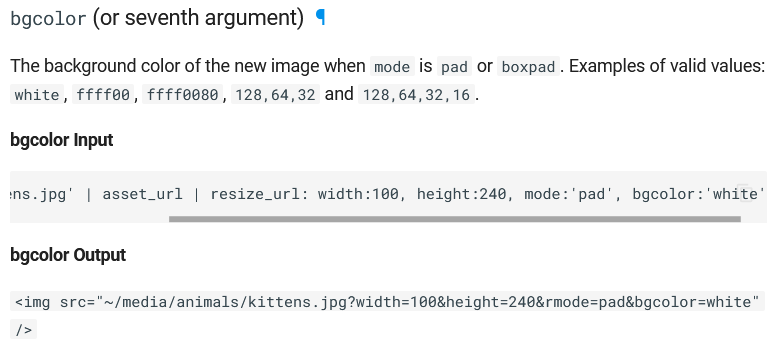
If you check out the documentation of Orchard Core, you will find some examples of how you can use the bgcolor argument to set the background color of the image using Liquid Filters or by using the Orchard.AssetUrl Razor Tag Helper.
Fix NRE in feature recipe step
Let's say you have a recipe and in your recipe, you have a Feature step. The Feature step can be used to say which module you would like to be enabled or disabled if you are running the given recipe, like
"steps": [{"name": "feature","disable": [],"enable": ["OrchardCore.HomeRoute","OrchardCore.Admin","OrchardCore.Diagnostics","OrchardCore.DynamicCache","OrchardCore.Features","OrchardCore.Navigation","OrchardCore.Recipes","OrchardCore.Resources","OrchardCore.Roles","OrchardCore.Settings","OrchardCore.Themes","OrchardCore.Users"]}]
Here we enabled several modules, but the disable step is empty. That's because, in this recipe, we just want to enable some modules, don't want to disable any of them. But if you define a feature step in your recipe without a disable or an enable step, you will get an NRE when executing the recipe. It's worth to mention the fix because it's very instructive. Let's see the FetaureStep IRecipeStepHandler, where you can see the ExecuteAsync method, which is responsible to process a given recipe step.
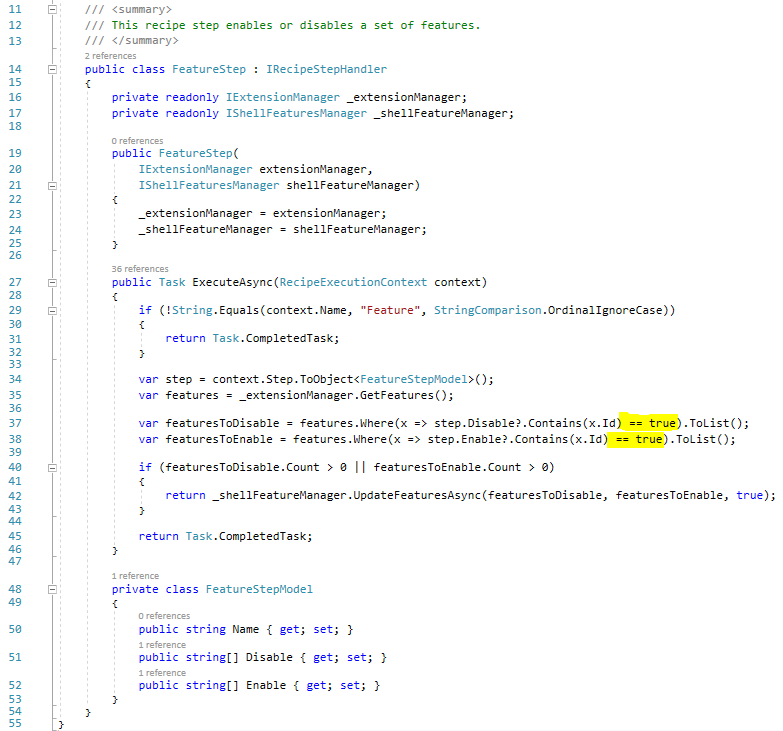
The assumption is that the Contains() method returns with true or false and therefore you don't need to add the == true. And it's true. But in this case, the Disable string array can be null and if it's null, it will return null. And null equals true will be false. So, without == true the answer can be null which did not compile: "Cannot implicitly convert type bool? to bool". And now if you don't have the enable or the disable step in your recipe, the execution of the recipe won't fail. Now if you check the built-in recipes, like the blog.reicpe.json file, you will not find the disable step there because it's unnecessary.
Improve sending emails from Orchard Core
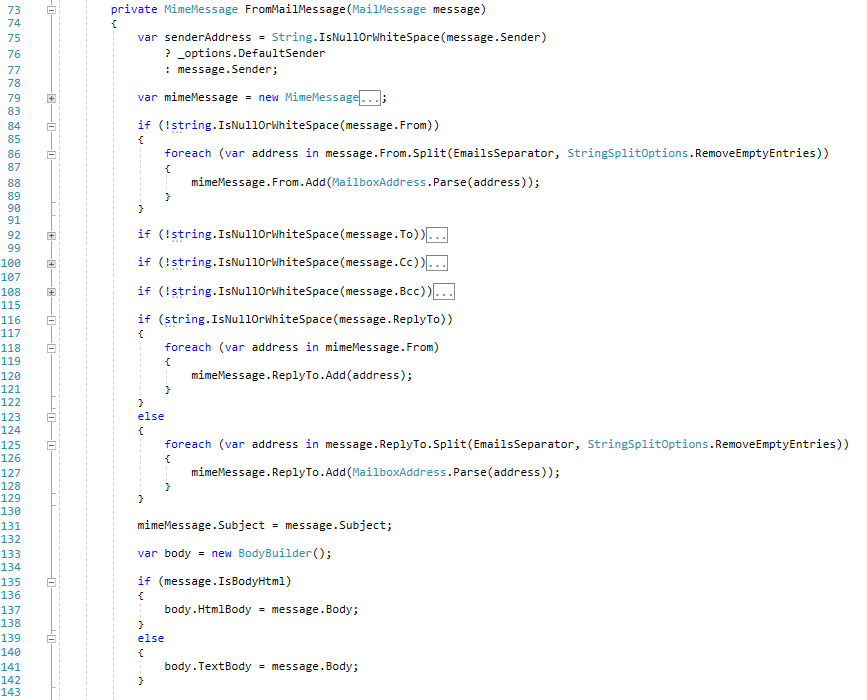
Email sending in Orchard Core has got several improvements lately. You can use the SendAsync method from the SmtpService to send emails from Orchard Core. The MailMessage class represents a class that contains information about the mail message. First, now your message can have multiple authors seperated by the ',' or the ';' chars.
The other is according to the following MailKit docs: "When the list of addresses in the Reply-To header is empty, replies should be sent to the mailbox(es) specified in the From header". See the related changes from line 116.
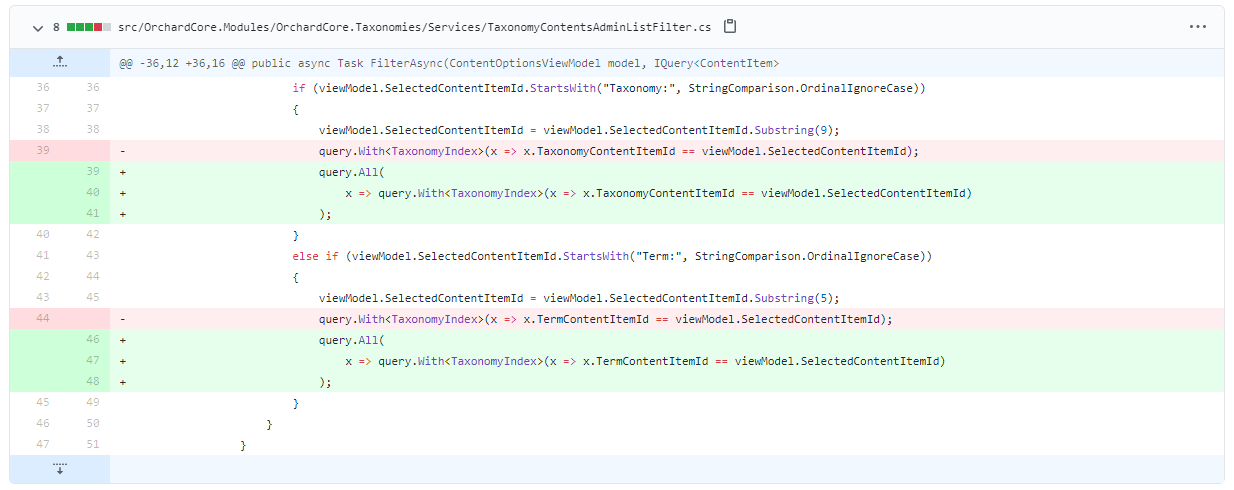
Upgrade YesSql and fix multiple taxonomy filter issues
The goal is to be able to filter on multiple taxonomies. The All method in the IQuery means, that all the predicates inside need to be true. And inside the All, you can call Any if you would like to. And actually, you can't have the same record with two different properties. But now you can do that multiple times and that would work, you can do an AND, it will work to have two predicates on the same index.
GraphQL is building SQL queries dynamically, because in GraphQL you can have complex expressions, like ANDs, ORs, INCLUDEs, STARTSWITHs, and all the things you want on different properties. We parse that thing and convert it to a dynamic SQL. The generated SQL would have to do INNER JOINs on the index table. And it broke GraphQL.
Nakamura understood how YesSql was building the query after the change by looking at the code of YesSql. And he changed the code to react to these changes by creating new kinds of dynamic SQL queries by using private reflection to get the dynamic names of the dynamic aliases.
Demos
Cypress Functional Tests
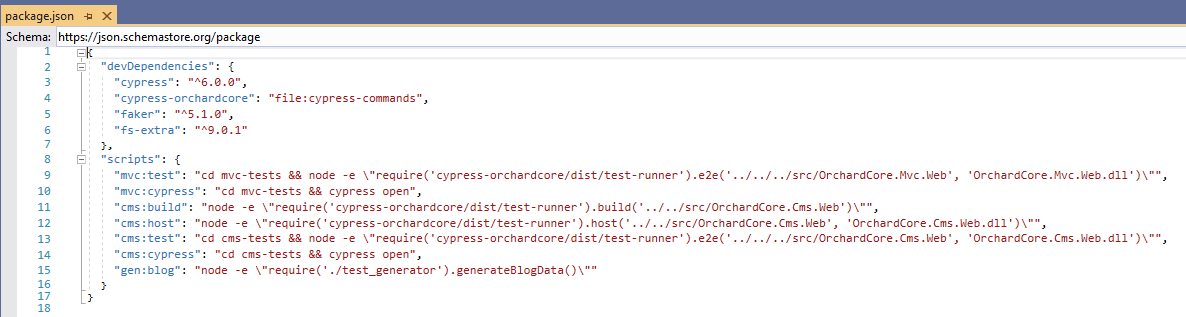
Clone the Orchard Core repository then navigate to the tests/functional folder using Windows PowerShell and type npm install to install the packages among with the package of Cypress OrchardCore that is a collection of Cypress commands for interacting with Orchard Core. Make sure you deleted your App_Data folder inside the OrchardCore.Cms.Web folder and type npm run cms:host to build the application and run it. Check out the package.json file in the OrchardCore.Tests.Functional project to see the built-in scripts that you can use and type in the PowerShell window.
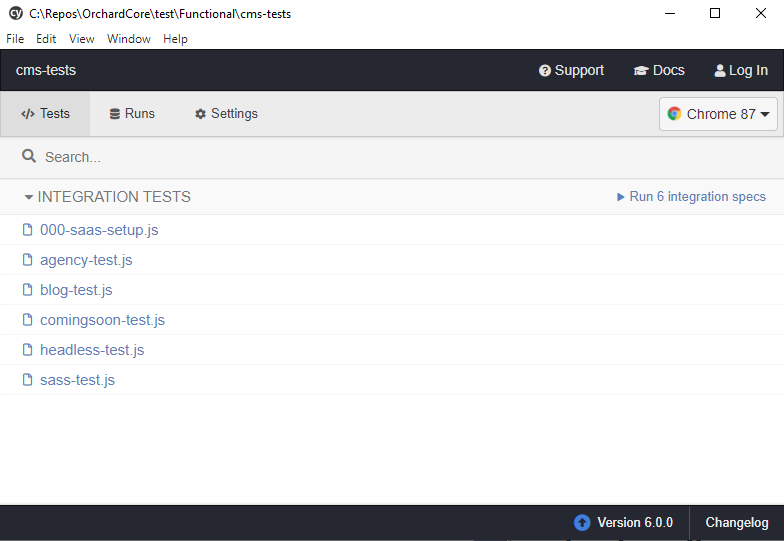
Now you have a running instance of Orchard Core, time to do some testing! Open a new PowerShell instance and navigate to the same tests/functional folder. Type npm run cms:cypress, which will open the Cypress UI. After some seconds a new window will open with the Cypress test runner. Here you can run all the tests or just pick one by simply clicking on it. Since the tests generate a GUID for the site name and the URL prefix, you can rerun them over and over again.
If you run a test, you can visually see what it's doing in the browser. Cypress verifies the JavaScripts too, so if there is any JavaScipt error on the page you visit using the tests, it will show you. If you hover over with your mouse in the steps on the left side of the browser, you can see what was the highlighted step actually did. Like you could see it was getting the textbox with the UserName ID and typed admin there. If you run the agency-test, you will see the following in your browser.
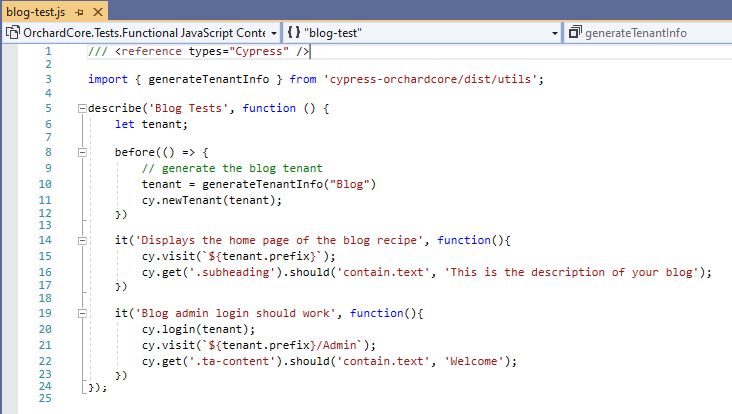
But how can I add tests like these and where are these tests in the solution? Well, navigate to the cms-tests/cypress/integration folder of the OrchardCore.Tests.Functional folder, where you can see the exact same files as you can see in the Cypress UI. As you can see, the blog-test.js files just open the given tenant and after logging in to the site, navigates to the admin UI of Orchard Core. If the HTML element with the ta-content class contains the Welcome text, it means that the login was successful.
And that's not all of it! If you would like to know more about Cypress testing, check out this recording on YouTube!
News from the community
Our full Orchard Core tutorial series, the Dojo Course 3 is here!
After a long wait, the new Orchard Core version of our legendary Dojo Course tutorial series is here, the Dojo Course 3!
Are you a newcomer and want to learn Orchard Core from the ground up, both from a user's and a developer's perspective? Are you somewhat familiar with Orchard Core but would like to get up to speed and become an Orchard pro? Look no further, check out Dojo Course 3! Dojo Course 3 guides you from the very basics of Orchard Core all up to be able to write your own themes and modules, utilizing various APIs of Orchard. We're publishing a tutorial video every day for 40 days starting on 1 December. So, this is your 40 days of Orchard :).
If you're looking for our previous Orchard 1.x tutorial series check out Dojo Course 2.
Orchard Dojo Newsletter
Lombiq's Orchard Dojo Newsletter has 174 subscribers! We have started this newsletter to inform the community around Orchard with the latest news about the platform. By subscribing to this newsletter, you will get an e-mail whenever a new post published to Orchard Dojo, including This week in Orchard of course.
Do you know of other Orchard enthusiasts who you think would like to read our weekly articles? Tell them to subscribe here!