This week in Orchard - 8/23/2018
Last week we had no 'This week in Orchard' post because of vacation, so in this post we will focus on the happenings of last week. And we have a lot to talk about so get ready for a longer post!
On Orchard 1.x
The latest version of Orchard 1.x (Orchard 1.10.2) released on Apr 27, 2017. The community fixed several bugs since then, so the next release of Orchard 1.x will be arrive soon. We would like to have a working Dynamic Compilation with C# 7 for the next version and Lombiq is working on this issue. After that, the community will release Orchard 1.10.3.
On Orchard Core
Culture settings
A new, Culture object is available in all Liquid pages on top of the Site object. This represents the site's default culture as an ISO language code. Culture has Name, that is the request's culture as an ISO language code, for example: en-Us. The Dir property of the Culture object contains the text writing directionality, like rtl or nothing that is the default means left to right. We need to mention two helper methods here, that you can use in the Razor layouts of Orchard Core.
The first one is the
OrchardCore.CultureDir()With this method, you can set the value of the dir property. You can see an example in the Layout.cshtml file of the TheAdmin theme.
<body class="preload" dir="@OrchardCore.CultureDir()">
...
</body>
The second one is the OrcharCore.CultureName() that is used in the same file:
<html lang="@OrchardCore.CultureName()">Instead of typing CultureInfo.CurrentUICulture you can just simply use this method and this way you don't have to add a using to System.Globalaziation, OrchardCore.CultureName will be enough.
Demos
Resume theme for Orchard Core
Antoine developed a new theme for Orchard Core, called Resume. You can download the new theme as a NuGet package and you can also test the theme here. Check out this site, that is using this theme here.

If you are interested in the features of the new theme, check out the recording of last week's Orchard meeting from this point.
MiniProfiler
Scott Hanselman updated his PC and now can build Orchard Core in 7.2 seconds. MiniProfiler is a simple, but effective mini-profiler for .NET, Ruby, Go and Node.js. Now you have the ability to enable MiniProfiler for Orchard Core. After that you can see for instance the duration in ms that is needed to render the different parts of the site. With the help of the MiniProfiler you also have the ability to test the caching of your site. This feature is available on the sebros/1895 branch.
Culture management improvements
In a previous post we mention that how you can set up the default culture of your site. Now let's see the new features of Orchard Core's localization! Make sure you enabled the Localization module.
The default culture will be used if the user didn't provide any information about the language that they use. When you host your site on localhost and reach that by an URL like: https://localhost:44300 you will see that the request header contains an accept-language: en-us. ASP.NET Core with the default configuration will look into this header and take it as a hint to find that language to use to render the page. It actually takes three elements into considerations by default: first its looking at the URL.
If we say that: https://localhost:44300?culture=en-Us, it will take that in priority, because we explicitly asking for this page with the en-US culture.
If we type: https://localhost:44300?culture=hu-HU and ask for Hungarian, we get the following when we see the page source, because we haven't set the site to support the Hungarian culture.

Then let's go to the Configuration -> Settings -> General page using the Dashboard. Here you can manage the default cultures that your site supports. This list tells that this site is available in these languages.
Let's add a supported culture for the site by clicking on the Add or remove supported cultures for the site link. Here select the hu-HU | Hungarian (Hungary) culture and hit Add. Also add the en-US | English (United States) culture to the list. Then go back to the General Settings page and hit Save. The site will restart for the settings to take effect.
Now if you view the page source you will see the following value of the lang property:

Your site now supports the Hungarian culture and Orchard can render you this page with the requested one.
Let's see a more interesting sample! Let's add a culture that uses RTL writing, for instance the fa-IR | Persian (Iran) culture. After if you ask the page with the fa-IR culture, you can see other changes in the page source as well. For example, the body dir has the rtl value, that means we can customize the css files in the themes based on the direction of the writing.

If you set up the site using the blog recipe you can also check out the correct format of the date.

Don't forget to watch the recording of the whole Orchard Podcast for the full demos!
Demoing the capabilities of Orchard Core Beta 2
Last Friday, Sébastien gives a nearly 2 hours long demo about the capabilities of Orchard Core! If you are new to Orchard Core and want an introductory overview about every notable features and goals you should check out his fantastic presentation! In the next lines we will give you a recap about the content of this presentation.
A quick overview of the OrchardCore solution using the Solution Explorer of Visual Studio
First, we have a quick overview of the OrchardCore solution using the Solution Explorer of Visual Studio. Under the src folder, there is an OrchardCore folder, that contains useful projects for every other module.
OrchardCore.Module folder contains not CMS-specific projects. For example, the Admin site, deployment, sending emails is nothing to do with the CMS. All these modules can be reused in any other app.
The OrchardCore.Modules.Cms folder contains content management specific modules, like managing content types, content fields, alias, autoroute to build routes dynamically, etc.
The main difference is that now you can create any web application and just reference a package called OrchardCore.Application.Cms.Targets and that references all the projects and any other modules for the CMS. The OrchardCore.Application.Cms.Targets is a project that just references all the CMS projects and the themes we have.
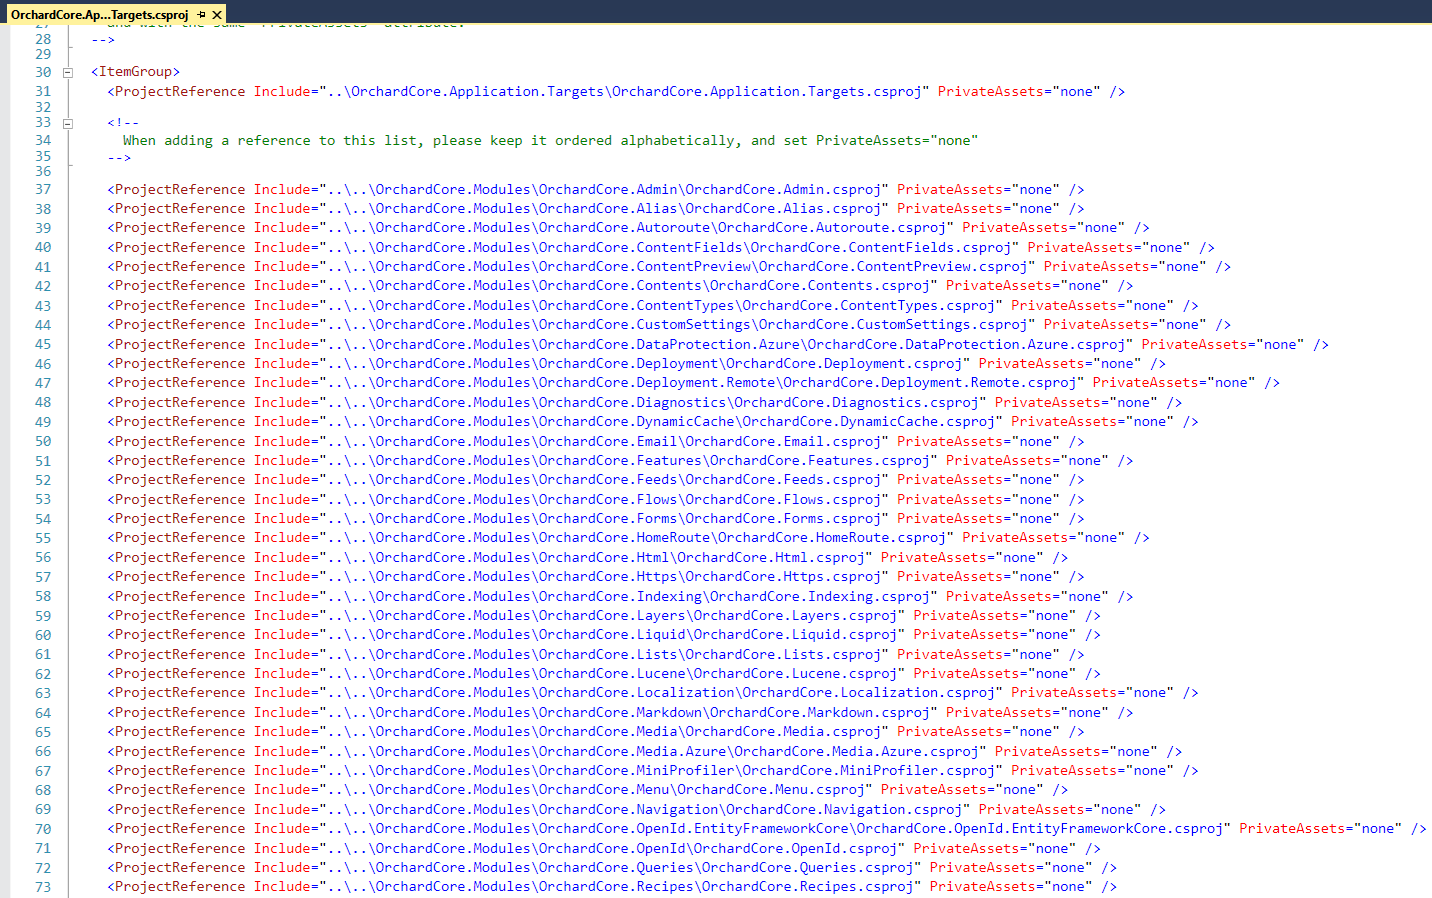
If you just want an MVC app, that is not a CMS, you should reference the OrchardCore.Application.Mvc.Targets project and then you won't have any CMS-specific modules, just the MVC logic to create an MVC modular app.
The OrchardCore.Cms.Web is just a simple web app, that references the OrchardCore.Application.Cms.Targets project.
Other difference here is that you can have modules and themes anywhere in the solution. Every project can be anywhere, there is no specific location to put the files, like Modules folder or Themes folder. The folders above are just solution folders, not physical folders.
Bag Part
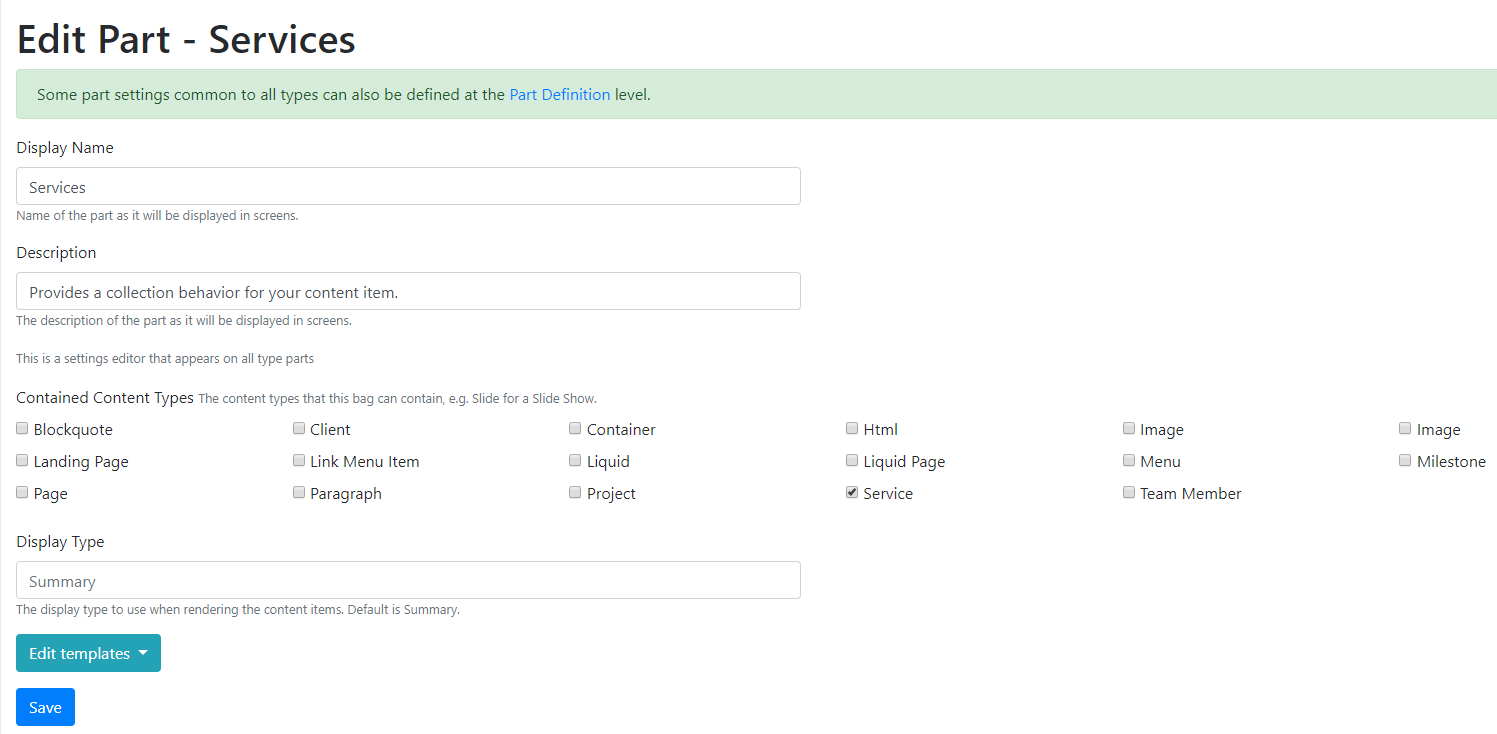
After we fire the application, Sébastian shows the menu of Orchard Core and the content items and content types, that are generated using the Agency setup recipe. Here you can find the Landing Page content type, that has a Services part. This part is a named part, called bag part. A bag part is a content part that can contain other content items. If you check the Contained Content Types, you will see that this part can only contains Service content items.
Live Preview in Orchard Core
In Orchard Core, the content item editor has a Preview button. Just Ctrl+Click on this button and try to edit the content of any content item. You will see your changes instantly in the new window thanks to the live preview feature.
Templates
In Orchard Core you still have the ability to create Razor templates as you did it in Orchard 1.x. The themes called SafeMode, TheAdmin and TheTheme contains the familiar cshtml files.
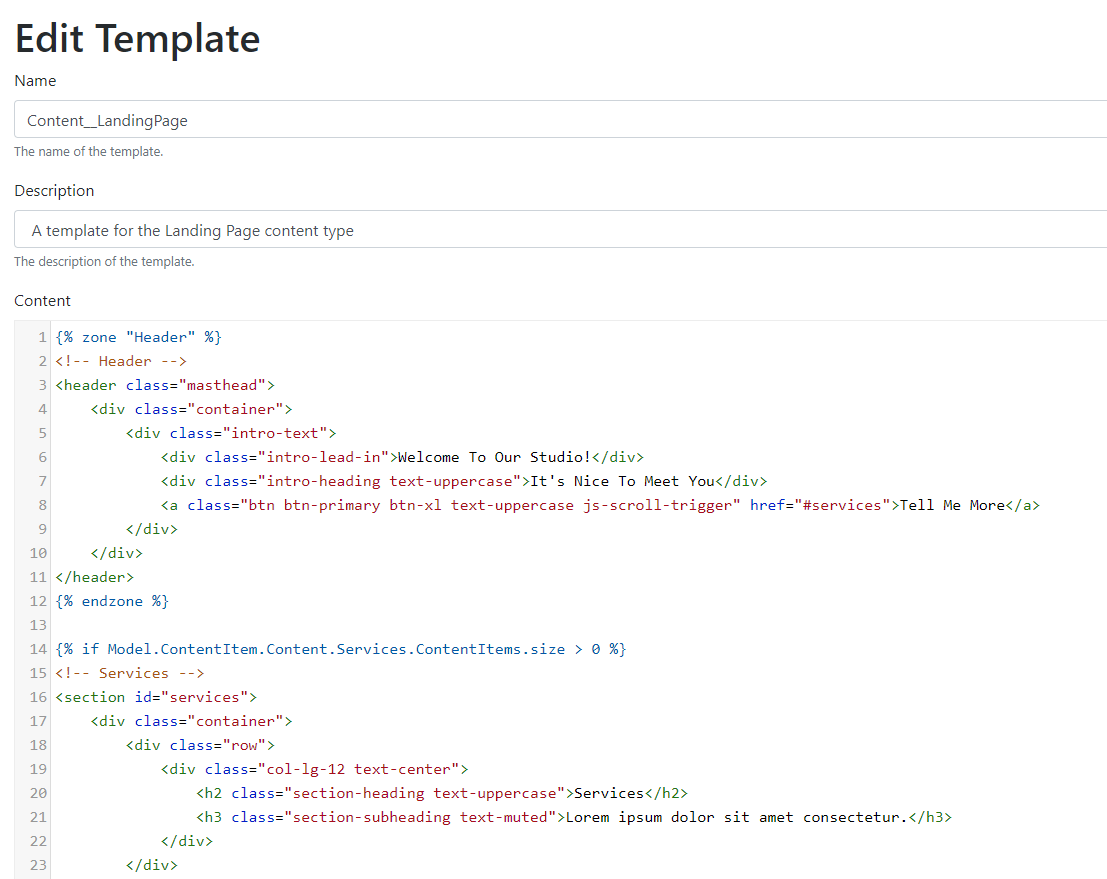
We can now make Liquid templates as you can see it in the case of the TheAgencyTheme or in the TheBlogTheme. You can create these files nearly with the same name convention as you did before in Orchard 1.x. But the TheAgencyTheme doesn't have a Content-Landingpage.liquid in the theme. Orchard Core has a module called Templates, that allows you to define front-end templates from the admin. If you navigate to Configuration -> Templates (and set up your site using the Agency recipe) you will see the template for the Landing Page content type. Here you can edit your template and also have the ability for the live preview!
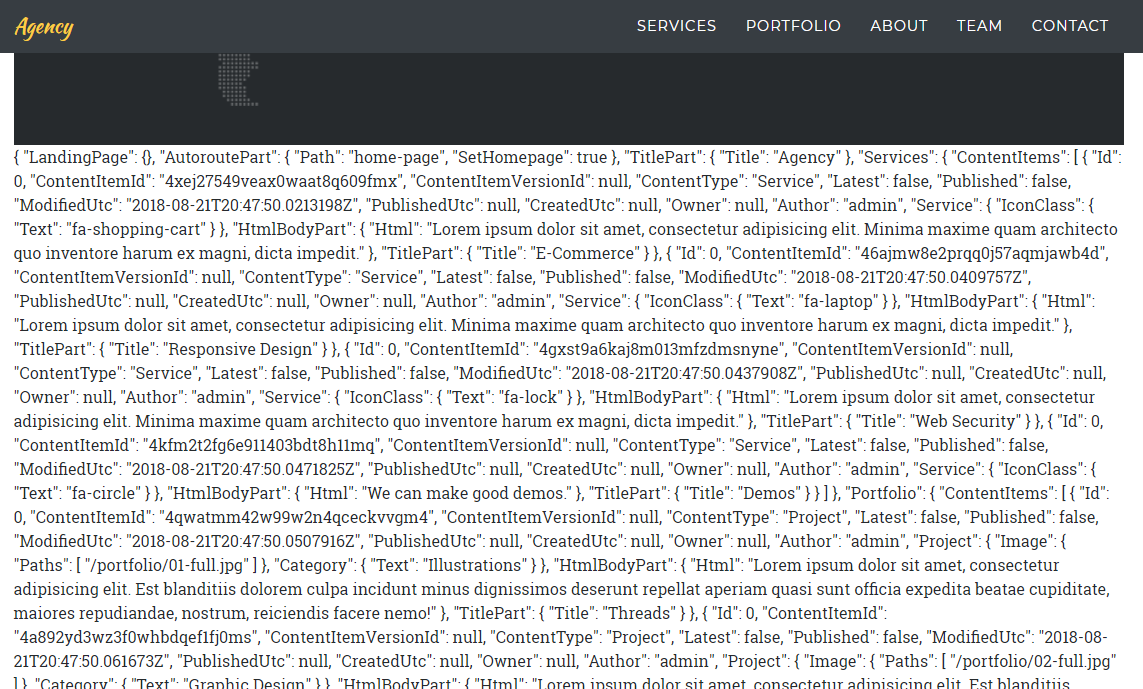
If you want to show what's available for instance in the Model.ContentItem.Content, you can simply render that using Liquid. The Liquid will output the JSON of the requested content and you can access every part of it directly without needing to save your template thanks to the live preview feature.
If you define a template in the admin, it will overwrite everything that is defined in the file system.
Running queries in Liquid pages
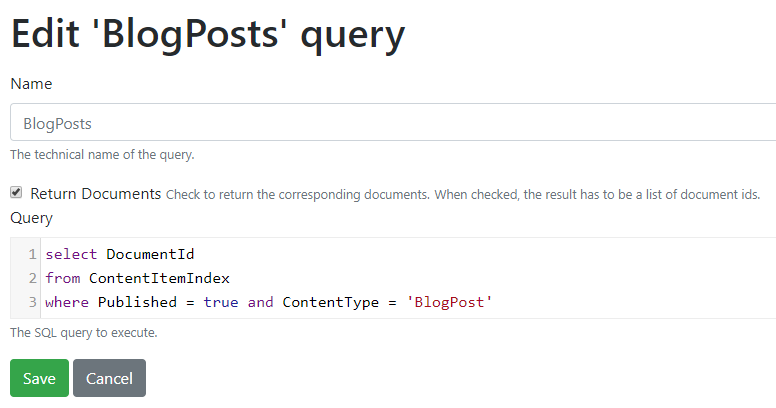
Let's say you set up your site using the Blog recipe and created another new blog post to it with title 'A very impressive blog post'. If you have enabled the Queries and the SQL Queries module you can add a new query under the Queries menu of Content from the admin.
Here we created a query called BlogPosts that will return every published content item with BlogPost content type. Check the tick near the Return documents checkbox. In this case the query will also return the documents (in this case blog posts) not just the DocumentIds.
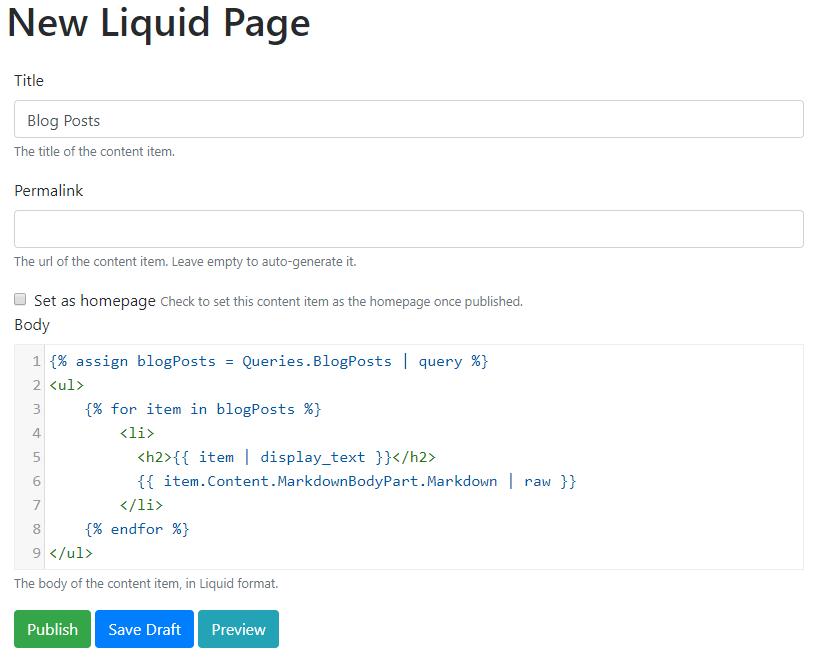
Now let's create a new Liquid page called Blog Posts where we will render the results of the previously created query. We have a Queries object available here that has access to all the defined queries. Using Liquid, we can iterate through the resulted items of our BlogPosts query.
These are SQL queries, so everything that is available in SQL you can query on that.
Flow Part
A flow part is like a bag part, but for widgets. Widget is a content item that is rendered in some way in a page. A flow will let us display all the available widgets. Widget can be any content type that you define.
Let's say we add a simple Html widget to a page with some content. The nice thing with the flow part that we can organize each widget on the flow of widgets. So, I can say it's justified, means it will take the full width of my page.
In this case you can create pages based on pieces of contents and can organize them in columns. And we also have a widget called Container that is also a flow of things.

You can create all the widgets that you want. For example, you can create a carousel widget that has a bag part of slides and then you can simply add more slides to it with your properties.
Why do we need Liquid and Jint instead of Razor
We use Liquid, because Razor is not safe, because its C#. If we let the admins or anyone to write Razor, we let them write C#. If we let them write C#, we let them to have access to everything. In Liquid you only have access to the properties that are opted in, so it’s like a sandbox.
The Layers module lets you edit widgets, place them in zones across the site based on rules. The Blog recipe has one widget, called Footer which is applied using the Always rule. This rule has a simple expression: true. This is JavaScript, because it’s safe, we do not have to run C#. Orchard Core also uses JavaScript in the Workflows module, where all the scripting is done without C#.
We haven't mention every aspect of the demo in the examples above, so we definitely suggest to take your time and watch the whole demo!
There is a possibility that a new live demo about how to create a new theme from scratch in Orchard Core will come from Sébastien this Friday (Aug 24). If you are interested in taking part in the live demo, check out his Twitter for further information!